
How to Harvest, Use & Preserve Fresh Basil: 5 Easy Ways to Enjoy Your Garden Harvest
Learn how to harvest basil and preserve it five easy ways, including freeze drying, freezing in olive oil, dehydrating, air drying, and storing fresh basil for maximum flavor.
If you've ever planted a single basil plant, you already know how this story goes.
One week you're carefully pinching off a few leaves for spaghetti night, and the next you're standing in the garden holding a basket, wondering how one little plant suddenly became a basil-producing machine.
The good news? Basil is one of the easiest herbs to harvest and preserve, and with just a little planning, you can enjoy that fresh-from-the-garden flavor long after summer has come and gone.
Whether you want to use basil fresh in tonight's dinner, freeze it for busy weeknights, dehydrate it for homemade seasoning blends, or freeze dry it for long-term pantry storage, there's a preservation method that's perfect for every gardener and every kitchen.
In this guide, I'll show you exactly how to harvest basil without hurting your plant, how to keep fresh basil tasting its best, and five simple ways to preserve your harvest so none of those beautiful leaves go to waste.
Who This Is For
🌿 Your basil plant suddenly exploded with more leaves than you know what to do with.
🌿 You're wondering when and how to harvest basil without damaging the plant.
🌿 You'd like to preserve fresh basil instead of watching it wilt in the refrigerator.
🌿 You're curious about the differences between freeze drying, freezing, dehydrating, and air drying basil.
🌿 You love stocking your pantry and freezer with homegrown ingredients you'll actually use throughout the year.
No matter how you choose to preserve your basil, you're about to discover just how easy it is to enjoy your garden harvest for months to come.
Table of Contents
- When Is Basil Ready to Harvest?
- How to Harvest Basil Without Hurting Your Plant
- Method 1: Enjoy Fresh Basil
- Method 2: How to Freeze Dry Basil
- Method 3: How to Freeze Basil in Olive Oil
- Method 4: How to Dehydrate Basil
- Method 5: How to Air Dry Basil
- Which Preservation Method Is Best?
- Frequently Asked Questions
When Is Basil Ready to Harvest?
One of the biggest questions new gardeners ask is, "When should I harvest my basil plant?" The good news is that basil is incredibly forgiving, and regular harvesting actually encourages it to grow even more.
Your basil plant is ready for its first harvest once it's about 6 to 8 inches tall and has several sets of healthy leaves. At this stage, the plant has enough growth to recover quickly after pruning while continuing to produce new stems throughout the season.
For the best flavor, harvest basil:
- Early in the morning after the dew has dried
- Before the afternoon heat arrives
- Before the plant begins flowering
- On a dry day whenever possible
Morning is the ideal time because the leaves contain the highest concentration of aromatic oils, giving you the freshest flavor whether you're using basil immediately or preserving it for later.
As tempting as it may be to give your plant a major haircut, avoid removing more than one-third of the plant at a time. Leaving plenty of healthy growth behind allows your basil to recover quickly and keeps it producing all summer long.
How to Harvest Basil Without Hurting Your Plant
Now that you know when to harvest your basil, let's talk about where to make the cut. This simple step can make the difference between a plant that produces all summer long and one that becomes tall, leggy, and full of flowers.
Instead of picking individual leaves, look for a leaf node, the spot where two small leaves or stems grow directly across from each other on the main stem. Using clean herb scissors or garden snips, cut the stem about ¼ inch above the leaf node.
Within a week or two, those two small leaves will grow into two new stems, making your basil plant fuller, bushier, and even more productive. Every time you harvest this way, you're encouraging your plant to branch instead of growing one long stem.
As you continue harvesting throughout the season, keep an eye out for flower buds beginning to form near the tops of the stems. Basil naturally wants to produce flowers, but once it starts putting energy into making seeds, leaf production slows and the flavor can become slightly more bitter.
Simply pinch off any flower buds as soon as you notice them. It only takes a few seconds and will keep your basil producing tender, flavorful leaves for weeks (or even months) longer.
Another common question is whether you should wash basil before preserving it. If your basil is clean and free from dirt, many gardeners choose not to wash it, especially if they're freeze drying. However, if your plants have been exposed to rain, dust, insects, or garden soil, give the leaves a gentle rinse under cool water and dry them thoroughly with a clean kitchen towel or salad spinner before using or preserving them. Excess moisture can affect nearly every preservation method, so taking the time to dry the leaves well is worth the extra few minutes.
Finally, resist the urge to harvest your entire basil plant at once. Even if you're planning a big batch of pesto or preserving herbs for winter, try to leave at least two-thirds of the plant intact whenever possible. A little patience goes a long way, and your basil will reward you with fresh harvest after fresh harvest until frost.
🌱 Farm Girl Shortcut
Don't toss those tender basil stems!
The smaller stems near the top of the plant are just as flavorful as the leaves and can be chopped into soups, sauces, pesto, and herb butter. Save the thicker, woody stems for the compost pile, but let those tender stems pull their weight in the kitchen—they're packed with the same fresh basil flavor.

If your basil starts looking like a tiny palm tree with a puff of leaves on top, don't panic.
It isn't judging your gardening skills, it's just begging for a haircut.
A few well-placed snips above the leaf nodes will have it growing into a beautiful, bushy plant again before you know it.
Method 1: Enjoy Fresh Basil
Before you start preserving every last leaf, do yourself a favor,
enjoy your basil fresh while it's in season.
There's something special about stepping out into the garden, snipping a handful of fragrant basil, and adding it to dinner just minutes later. Fresh basil has a sweet, peppery flavor and vibrant aroma that's difficult to replicate once it's been preserved. While every preservation method in this guide has its place, nothing quite compares to basil that's freshly picked.
The beauty of basil is that it doesn't require complicated recipes to shine. A few leaves can transform an ordinary meal into something that tastes fresh, homemade, and full of summer flavor.
Easy Ways to Use Fresh Basil
Need a little inspiration? Here are some of my favorite ways to use fresh basil straight from the garden:
- Layer fresh basil on a classic Caprese salad with ripe tomatoes, fresh mozzarella, olive oil, balsamic glaze, and flaky sea salt. So delish, this is my fav!
- Blend homemade basil pesto for pasta, sandwiches, pizza, or as a dip for fresh bread.
- Tear fresh basil over homemade pizza just before serving. Try your hand at a margherita pizza, you won't be disappointed!
- Stir chopped basil into warm pasta with butter, garlic, olive oil, and freshly grated Parmesan cheese.
- Add whole basil leaves to sandwiches, wraps, burgers, or grilled chicken.
- Toss chopped basil into pasta salads or green salads.
- Mix basil into cucumber and tomato salads fresh from the garden.
- Sprinkle chopped basil over scrambled eggs or omelets.
- Stir fresh basil into soups just before serving for a burst of flavor.
- Blend basil into homemade salad dressings or vinaigrettes.
- Mix chopped basil into softened butter to create a flavorful herb butter for bread, vegetables, or grilled meats.
- Add basil to bruschetta or crostini.
- Stir chopped basil into cottage cheese or cream cheese for an easy spread.
- Infuse ice water, lemonade, or iced tea with fresh basil and lemon slices.
- Garnish grilled vegetables, roasted potatoes, or fresh corn with chopped basil.
One of my favorite summer rituals is walking out to the garden just before dinner with a pair of herb snips in one hand and a little basket in the other. It only takes a minute, but those freshly picked herbs somehow make the entire meal feel just a little more special.
How to Keep Basil Fresh After Harvesting
If you aren't ready to preserve your basil right away, don't worry. With a little care, you can keep fresh basil looking and tasting its best for several days.
The easiest method is to treat your basil like a bouquet of flowers. Trim the ends of the stems and place them in a mason jar or glass with an inch or two of water. Leave the jar on your kitchen counter out of direct sunlight and loosely cover the leaves with a plastic bag if you'd like to help retain moisture.
Contrary to what many people think, fresh basil doesn't always love the refrigerator. Because basil is sensitive to cold temperatures, refrigeration can cause the leaves to darken and wilt more quickly. For short-term storage, room temperature is often the better choice.
If you've already removed the leaves from the stems, wrap them loosely in a slightly damp paper towel, place them in an airtight container or reusable storage bag, and refrigerate them for a day or two until you're ready to use or preserve them.
Fresh basil is always at its best when enjoyed within a few days of harvesting, which is why preserving your larger harvests is such a great way to enjoy that garden flavor long after summer ends.

Let's settle one of the biggest garden debates.
Fresh basil and dried basil aren't competitors—they're teammates.
Fresh basil brings bright, delicate flavor to salads, pasta, and sandwiches, while preserved basil shines in soups, sauces, casseroles, and slow-cooked meals. Having both in your kitchen means you'll always have the right herb for the job.
❤️ Just Between Us
If you peek inside my kitchen after a big basil harvest, you'll probably find a little of everything happening at once. A handful goes into dinner, another bunch waits on the counter in a mason jar, and the rest gets preserved for later.
After all, when the garden is generous, there's no reason to choose just one way to enjoy it.
Next, let's look at my favorite long-term preservation method and the one that keeps basil tasting the closest to fresh.
Method 2: How to Freeze Dry Basil
If you've ever opened a jar of freeze-dried basil in the middle of winter and caught that unmistakable fresh garden aroma, you'll understand why this is my favorite way to preserve basil.
Freeze drying does an incredible job of preserving basil's bright green color, fresh flavor, and natural aroma because the moisture is removed at extremely low temperatures instead of using heat. The result is an herb that tastes remarkably close to fresh basil and stores beautifully for years when packaged properly.
While a freeze dryer is certainly an investment, it's become one of my favorite tools for preserving everything from herbs and fruits to vegetables, meals, and even dairy products. If you already own one, basil deserves a spot on your next batch.
How to Freeze Dry Basil
Freeze drying basil is surprisingly simple.
- Harvest your basil in the morning after the dew has dried.
- Remove any damaged, yellow, or spotted leaves.
- Rinse the basil gently if needed to remove dirt or insects.
- Pat the leaves completely dry using clean kitchen towels or a salad spinner. Excess moisture can increase your freeze-drying time.
- Remove the leaves from the larger stems. Tender stems near the tops of the plant can also be freeze dried if desired.
- Spread the basil leaves in a single layer on your freeze dryer trays. Try not to pile them on top of one another so air can circulate evenly.
- Run your freeze dryer according to the manufacturer's instructions until the leaves are completely dry and crisp.
Freeze Drying My First Batch of Basil
Properly freeze-dried basil should crumble easily between your fingers and show no signs of remaining moisture.
Whole Leaves or Crushed?
One of the biggest advantages of freeze drying basil is that you can store it either way.
I like to freeze dry the leaves whole and leave them that way until I'm ready to cook. Whole leaves retain their flavor and aroma longer because less surface area is exposed to air.
When it's time to use them, simply crumble the amount you need directly into your recipe. It only takes a few seconds, and you'll capture more of those wonderful aromatic oils than if you had crushed the entire batch months earlier.
Of course, if you prefer the convenience of ready-to-use herbs, you can lightly crumble the basil before storing it. Just avoid grinding it into a fine powder unless you're making a homemade seasoning blend.
How to Store Freeze-Dried Basil
Once your basil has finished freeze drying, allow it to cool for a few minutes before packaging.
Transfer the leaves to clean, dry mason jars or Mylar bags and add an oxygen absorber if you're storing them for the long term. Vacuum sealing your jars provides even more protection against moisture and helps extend the shelf life.
Store your basil in a cool, dark pantry away from heat, humidity, and direct sunlight.
When stored properly, freeze-dried basil can maintain excellent quality for years, making it one of the longest-lasting preservation methods available.
Pros of Freeze Drying Basil
✔ Preserves outstanding flavor and aroma
✔ Retains its beautiful green color
✔ Long shelf life when packaged properly
✔ Lightweight and easy to store
✔ Rehydrates quickly during cooking
✔ No freezer space required
Cons of Freeze Drying Basil
- Requires a freeze dryer
- Higher upfront equipment cost
- Batch times are longer than some other preservation methods
🌱 Farm Girl Shortcut
Freeze dry your basil whole whenever possible.
Instead of crushing your entire harvest right away, store the leaves whole and crumble only what you need while you're cooking. You'll preserve more of basil's natural oils, giving you better flavor and aroma every time you open the jar.
🌼 Did You Know?
Freeze drying removes moisture through a process called sublimation, where ice turns directly into vapor without becoming liquid first. Because very little heat is used, freeze-dried basil retains much more of its original color, flavor, aroma, and nutritional value than many traditional drying methods.
❤️ Just Between Us
Every summer I tell myself I'll only freeze dry "a little" basil.
Then harvest day arrives and suddenly every empty freeze dryer tray in the house is covered in basil leaves.
Future me has never once complained about opening those jars in the middle of January.
Next up, let's look at another simple favorite...freezing fresh basil in olive oil for quick and flavorful weeknight meals.
Method 3: How to Freeze Basil in Olive Oil
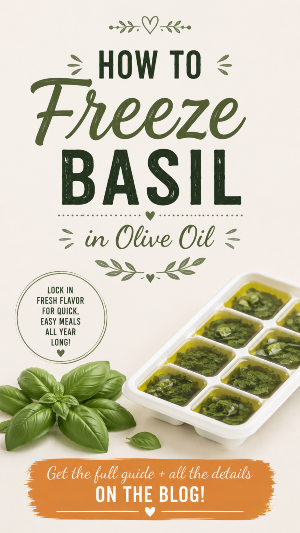
If freeze drying isn't an option, freezing basil in olive oil is one of the easiest and most flavorful ways to preserve your harvest.
This method is perfect for anyone who loves making homemade soups, pasta dishes, sauces, casseroles, or skillet meals. Instead of reaching for dried herbs, you can simply pop a frozen basil cube into your recipe and enjoy the fresh flavor of summer, even in the middle of winter.
The olive oil helps protect the basil from freezer burn while locking in much of its fresh flavor and aroma. Best of all, you don't need to blanch the basil first, making this one of the quickest preservation methods available.
Can You Freeze Basil Without Blanching?
Absolutely!
One of the most common questions gardeners ask is whether basil needs to be blanched before freezing. The answer is no.
Unlike some vegetables that benefit from blanching, basil freezes beautifully without this extra step, especially when it's combined with olive oil. Skipping the blanching process saves time while helping preserve the herb's fresh flavor.
How to Freeze Fresh Basil in Olive Oil
Freezing basil couldn't be much simpler.
- Harvest fresh basil and remove any damaged or yellow leaves.
- Rinse the basil if needed and dry it thoroughly with a clean kitchen towel or salad spinner.
- Remove the leaves from the larger stems.
- Finely chop the basil by hand or pulse it a few times in a food processor.
- Fill each compartment of an ice cube tray about two-thirds full with chopped basil.
- Pour enough extra virgin olive oil over the basil to completely cover it.
- Stir gently with a small spoon or butter knife to remove any trapped air pockets.
- Freeze until solid, usually overnight.
- Once frozen, transfer the cubes to a labeled freezer-safe bag or airtight container.
Now, whenever you're making soup, pasta sauce, chili, roasted vegetables, or sautéed chicken, simply drop in a cube or two as your meal cooks.
Best Recipes for Frozen Basil Cubes
Frozen basil cubes are ideal for recipes where the basil will be cooked rather than served fresh.
Some of my favorite ways to use them include:
- Spaghetti sauce
- Homemade marinara
- Lasagna
- Chicken Alfredo
- Vegetable soup
- Minestrone
- Tomato soup
- Homemade pizza sauce
- Pesto pasta
- Sautéed zucchini or squash
- Garlic butter shrimp
- Roasted vegetables
- Slow cooker meals
- Homemade bread dipping oil
Because the basil is already chopped and mixed with olive oil, meal prep becomes even easier on busy weeknights.
How Long Does Frozen Basil Last?
When stored in an airtight freezer container, basil preserved in olive oil generally maintains its best quality for 6 to 12 months.
While it's still safe to use beyond that timeframe if continuously frozen, the flavor is at its peak during the first year.
Pros of Freezing Basil in Olive Oil
✔ Easy for beginners
✔ No blanching required
✔ Great flavor retention
✔ Perfect portion sizes for cooking
✔ Uses simple kitchen supplies
✔ Saves time during meal prep
Cons of Freezing Basil in Olive Oil
- Requires freezer space
- Not suitable for fresh salads or garnishes
- Texture softens after thawing
- Shorter storage life than freeze-dried basil
🌱 Farm Girl Shortcut
Use silicone ice cube trays instead of rigid plastic ones.
The frozen basil cubes pop out much more easily, and the trays are simple to wash and reuse throughout the garden season.

Have more basil than ice cube trays?
Don't worry.
Freeze the cubes overnight, pop them into a labeled freezer bag the next morning, and reuse the tray to make another batch. Before long, you'll have a freezer stocked with ready-to-use basil for months of home-cooked meals.
❤️ Just Between Us
There's something incredibly satisfying about tossing one little basil cube into a simmering pot of soup in the middle of January.
For just a moment, your kitchen smells like summer again and that's one of the sweetest rewards of growing your own herbs.
Next, let's take a look at one of the oldest and most budget-friendly preservation methods: how to dehydrate basil for a shelf-stable pantry staple.
Method 4: How to Dehydrate Basil
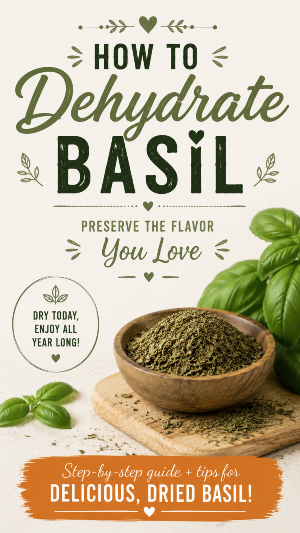
If you're looking for an affordable, time-tested way to preserve your basil harvest, dehydrating is a wonderful option. Long before freeze dryers became popular, gardeners were drying herbs to enjoy their homegrown flavors throughout the year and it's still one of the easiest preservation methods today.
While dehydrated basil won't have quite the same vibrant color or fresh aroma as freeze-dried basil, it still adds wonderful flavor to soups, sauces, casseroles, seasoning blends, and countless everyday recipes.
If you already own a food dehydrator, this method is simple, reliable, and perfect for preserving large harvests.
How to Dehydrate Basil
Drying basil is easy, but taking a few extra minutes to prepare the leaves properly will give you the best results.
- Harvest your basil in the morning after the dew has dried.
- Remove any damaged, yellow, or spotted leaves.
- Rinse the basil if needed and dry it thoroughly using a clean kitchen towel or salad spinner.
- Remove the leaves from the larger stems.
- Arrange the basil leaves in a single layer on your dehydrator trays, leaving a little space between the leaves for good airflow.
- Set your dehydrator to 95°F to 105°F, or use the herb setting if your dehydrator has one.
- Dry the basil until the leaves are crisp and crumble easily between your fingers. Depending on humidity and the size of the leaves, this usually takes 2 to 6 hours.
Avoid raising the temperature to speed up the process. Lower temperatures help preserve more of basil's flavor, color, and essential oils.
Whole Leaves or Crushed?
Just like freeze-dried basil, dehydrated basil keeps its flavor longer when stored as whole leaves.
Instead of crushing your entire batch after drying, store the leaves whole in an airtight jar and crumble only what you need while cooking. This helps protect the flavorful oils inside the leaves and keeps your basil tasting fresher over time.
How to Store Dehydrated Basil
Once your basil has cooled completely, transfer it to clean, airtight glass jars or other moisture-proof containers.
Store your jars in a cool, dark pantry away from direct sunlight, heat, and humidity. Proper storage is one of the biggest factors in maintaining flavor.
For the best quality, use your dehydrated basil within 1 to 2 years, although it may remain safe to use beyond that if stored properly.
Pros of Dehydrating Basil
✔ Budget-friendly preservation method
✔ No freezer space required
✔ Shelf stable
✔ Simple for beginners
✔ Great for seasoning blends and everyday cooking
✔ Perfect for preserving larger harvests
Cons of Dehydrating Basil
- Some flavor is lost during the drying process
- Leaves lose their bright green color
- More fragile than freeze-dried basil
- Shorter shelf life than freeze-dried herbs
🌿 Farm Girl Tip
Don't judge your dehydrated basil by its color alone.
It's completely normal for basil to darken slightly as it dries. While it may not have the vibrant green color of fresh or freeze-dried basil, it will still add wonderful flavor to your favorite recipes.

Ever notice how amazing your kitchen smells while basil is dehydrating?
That's because some of those wonderful aromatic oils are being released into the air. It's one of the reasons dehydrated basil has a milder flavor than freeze-dried basil but it's also a pretty wonderful excuse to linger in the kitchen a little longer.
🌼 Did You Know?
Many store-bought dried herbs are harvested, processed, packaged, transported, and then sit on grocery store shelves for months before they ever reach your spice cabinet.
When you dehydrate basil from your own garden, you're preserving herbs at their peak freshness, often within hours of harvesting. That means better flavor, a fresher aroma, and the satisfaction of knowing exactly where your herbs came from.
❤️ Just Between Us
There was a time when dehydrating herbs was the only preservation method I knew, and honestly, it served me well for years.
Even though freeze drying has become my favorite for long-term storage, I still find myself pulling out the dehydrator when the garden decides to give me more basil than my freeze dryer trays can handle. Around here, we believe there's no such thing as too much basil, just more opportunities to fill the pantry.
Next, let's look at one of the simplest preservation methods of all: how to air dry basil, a classic technique that requires little more than good airflow and a little patience.
Method 5: How to Air Dry Basil
Long before dehydrators and freeze dryers came along, gardeners preserved their herbs the old-fashioned way by letting nature do the work.
Air drying basil is one of the simplest and most inexpensive preservation methods because it requires very little equipment. If you have a warm, dry space with good air circulation, you can dry basil naturally and enjoy homegrown herbs long after the growing season has ended.
While air drying takes a little more patience, it's a wonderful option for small harvests or anyone just beginning their food preservation journey.
How to Dry Fresh Basil Naturally
The key to successful air drying is keeping the basil dry, well-ventilated, and out of direct sunlight.
- Harvest basil after the morning dew has dried.
- Remove any damaged or yellow leaves.
- If needed, gently rinse the basil and dry it thoroughly with a clean kitchen towel or salad spinner.
- Remove the leaves from the larger stems.
- Spread the leaves in a single layer on a mesh drying rack, cooling rack, clean screen, or parchment-lined baking sheet.
- Place the tray in a warm, dry room with plenty of airflow and away from direct sunlight.
- Turn the leaves every day or two so they dry evenly.
- Continue drying until the leaves are completely crisp and crumble easily between your fingers.
Depending on the humidity in your home, air drying can take anywhere from several days to two weeks.
Can You Hang Basil to Dry?
Yes! Hanging basil in small bundles is another traditional method that many gardeners still use today.
Gather a few stems together and secure them with twine or a rubber band. Hang the bundles upside down in a warm, dry area with good airflow and out of direct sunlight.
While hanging works well, I personally prefer laying the leaves flat on a drying rack. The leaves dry more evenly, there's less chance of mold developing in the center of a bundle, and it's easier to keep an eye on their progress.
How to Store Air-Dried Basil
Once the leaves are completely dry, transfer them to clean, airtight glass jars.
Store the jars in a cool, dark pantry away from heat, sunlight, and moisture. As with other dried herbs, keeping the leaves whole until you're ready to cook helps preserve more of their flavor and aroma.
For the best quality, use your air-dried basil within about one year.
Pros of Air Drying Basil
✔ No special equipment required
✔ Uses no electricity
✔ Budget-friendly
✔ Great for small harvests
✔ Traditional preservation method
Cons of Air Drying Basil
- Takes the longest of all the preservation methods
- Weather and humidity can slow the drying process
- Greater chance of mold if leaves aren't completely dry
- Some loss of flavor and color
- Shorter shelf life than freeze-dried basil
🌱 Farm Girl Shortcut
If your home tends to be humid, place a small fan several feet away from your drying rack to gently improve airflow.
You don't want the leaves blowing around, just enough air movement to help moisture escape and reduce the chance of mold.
🌼 Did You Know?
Sunlight may seem like it would help herbs dry faster, but it actually breaks down many of the essential oils that give basil its wonderful flavor and aroma.
For the best results, always dry basil in a shaded area with good air circulation.

Patience has always been one of a gardener's greatest tools.
Whether you're waiting for tomatoes to ripen, bread to rise, or basil to dry, some of the best things simply can't be rushed.
❤️ Just Between Us
There's something special about preserving food the same way generations before us did.
Even with all the modern equipment available today, I still enjoy slowing down once in a while and using the simple methods that remind me gardening isn't just about growing food, it's about preserving traditions, too.
Now that we've explored five different ways to harvest, use, and preserve basil, let's compare them side by side so you can decide which method fits your kitchen, your budget, and your gardening style best.
Which Preservation Method Is Best?
By now, you've probably realized there isn't a single "right" way to preserve basil. The best method depends on your kitchen, your budget, how you plan to use your basil, and what equipment you already have.
Personally? You'll usually find me using several methods throughout the summer.
Some basil goes straight into dinner that evening, another batch gets tucked into the freeze dryer for long-term pantry storage, a few trays become olive oil cubes for quick weeknight meals, and if my garden really decides to show off, the dehydrator gets put to work, too.
Each preservation method has its own strengths, which is why I think it's worth knowing them all.
Basil Preservation Comparison
| Preservation Method | Flavor | Color | Shelf Life | Equipment Needed | Best For |
|---|---|---|---|---|---|
| Fresh Basil | ⭐⭐⭐⭐⭐ | ⭐⭐⭐⭐⭐ | 3–7 days | None | Salads, sandwiches, pizza, pesto, and garnishes |
| Freeze Drying | ⭐⭐⭐⭐⭐ | ⭐⭐⭐⭐⭐ | Up to 20+ years when properly packaged | Freeze Dryer | Long-term pantry storage and everyday cooking |
| Frozen in Olive Oil | ⭐⭐⭐⭐⭐ | ⭐⭐⭐⭐☆ | 6–12 months | Ice Cube Tray | Soups, sauces, pasta, and skillet meals |
| Dehydrating | ⭐⭐⭐⭐☆ | ⭐⭐⭐☆☆ | 1–2 years | Food Dehydrator | Seasoning blends and everyday cooking |
| Air Drying | ⭐⭐⭐☆☆ | ⭐⭐⭐☆☆ | About 1 year | Drying Rack or Screen | Budget-friendly preservation |
Which Method Do I Recommend?
If I could only choose one method, it would be freeze drying without hesitation.
The flavor is incredibly close to fresh basil, the color stays beautifully green, and when stored properly, it lasts for years without taking up valuable freezer space. It has completely changed the way I preserve herbs from my garden.
That said, I know a freeze dryer isn't in everyone's kitchen, and that's perfectly okay.
If you're just getting started, freezing basil in olive oil is probably my next favorite recommendation. It's inexpensive, incredibly simple, and having ready-to-use basil cubes waiting in the freezer makes homemade meals so much easier.
If you already own a dehydrator, don't hesitate to use it. Dehydrated basil is still far fresher and more flavorful than many jars of dried herbs sitting on grocery store shelves.
And if you don't have any special equipment at all? Air drying is a wonderful place to start. Gardening has never been about having the fanciest tools, it's about making the most of what you have.
🌿 Farm Girl Tip
Don't feel like you have to choose just one preservation method.
In my kitchen, basil usually ends up in several different places. I freeze dry the majority for long-term storage, keep a few olive oil cubes in the freezer for quick meals, dehydrate enough for seasoning blends, and always save plenty to enjoy fresh while the garden is overflowing.
After all, one healthy basil plant often produces enough leaves to do a little bit of everything.
❤️ Just Between Us
One of my favorite things about preserving basil isn't filling the pantry, it's opening a jar in the middle of January.
The moment that fresh basil aroma escapes, I'm reminded of warm summer evenings, overflowing garden beds, and all the simple joy that comes from growing something with your own two hands.
That's the real magic of preserving your harvest. You're not just saving herbs, you're saving a little piece of summer.
Frequently Asked Questions
Can you freeze basil without blanching?
Yes! Basil can be frozen without blanching, especially when preserving it in olive oil. Unlike many vegetables, basil doesn't require blanching before freezing. Simply wash and dry the leaves thoroughly, chop them if desired, cover them with olive oil in an ice cube tray, and freeze until solid.
What is the best way to preserve basil?
The best way to preserve basil depends on how you plan to use it.
If you want the closest flavor, color, and aroma to fresh basil, freeze drying is my top recommendation. For quick weeknight cooking, freezing basil in olive oil is incredibly convenient. If you're looking for an affordable pantry option, dehydrating or air drying are both excellent choices.
How long does fresh basil stay fresh?
Fresh basil usually stays fresh for 3 to 7 days when stored properly. One of the best ways to keep basil fresh is to place the stems in a jar with a small amount of water, just like a bouquet of flowers, and leave it on your kitchen counter away from direct sunlight.
Should you refrigerate fresh basil?
Not unless you have to.
Fresh basil is sensitive to cold temperatures, and refrigeration can cause the leaves to darken and wilt more quickly. For short-term storage, keeping the stems in water on your countertop is often the better option.
Can you freeze fresh basil leaves whole?
Yes! Basil leaves can be frozen whole, but they will soften once thawed. They're best used in cooked dishes like soups, sauces, casseroles, and pasta rather than fresh salads or garnishes.
Is it better to freeze dry or dehydrate basil?
Both methods work well, but they produce different results.
Freeze drying preserves more of basil's natural color, flavor, aroma, and texture because very little heat is used during the preservation process. Dehydrating is more affordable and still produces excellent herbs for everyday cooking, although some flavor and color are naturally lost.
How do you dry basil leaves naturally?
To air dry basil, spread clean, dry leaves in a single layer on a mesh drying rack or baking sheet lined with parchment paper. Place them in a warm, dry area with good airflow and out of direct sunlight. Turn the leaves every day or two until they become crisp and crumble easily.
Should basil be washed before preserving?
If your basil is clean and free from dirt or insects, many gardeners choose not to wash it, especially before freeze drying. However, if the leaves have been exposed to soil, rain, or garden debris, give them a gentle rinse and dry them thoroughly before preserving. Removing excess moisture helps prevent spoilage and improves the quality of every preservation method.
Can you preserve basil with the stems attached?
Tender stems near the tops of the plant are perfectly fine to preserve and use in cooking because they're soft and flavorful. Larger, woody stems are best removed before preserving and can be added to your compost pile.
How long does preserved basil last?
The shelf life depends on the preservation method:
- Fresh basil: 3–7 days
- Frozen in olive oil: 6–12 months
- Dehydrated basil: 1–2 years
- Air-dried basil: About 1 year
- Freeze-dried basil: Up to 20 years or more when properly packaged in airtight containers with oxygen absorbers and stored in a cool, dark place.
Can you use preserved basil the same way as fresh basil?
Not always.
Fresh basil is best for salads, sandwiches, pizza, and recipes where you want its bright, delicate flavor to shine. Preserved basil—whether freeze dried, dehydrated, air dried, or frozen—is better suited for cooked dishes like soups, sauces, casseroles, pasta, and slow cooker meals where it has time to rehydrate and release its flavor.
🌿 Farm Girl Tip
If you're new to preserving herbs, don't overthink it.
Start with the method that fits your kitchen today. Whether that's enjoying basil fresh from the garden, freezing a few olive oil cubes, or drying your first batch on a simple rack, every jar you fill is one less bundle of herbs you'll need to buy at the grocery store.
And trust me, there's something incredibly satisfying about seasoning a January meal with basil you grew yourself the summer before.
Final Thoughts: Don't Let Your Basil Harvest Go to Waste
If there's one thing I've learned from growing basil over the years, it's this:
You can never have too much basil, only too few ways to preserve it.
Whether your harvest fills a small colander or an entire kitchen counter, taking a little time to preserve those fragrant leaves means you'll be rewarded with homegrown flavor long after the garden has gone to sleep for the winter.
The best part is that you don't need fancy equipment to get started. Enjoy handfuls of fresh basil while it's in season, freeze a few olive oil cubes for quick weeknight dinners, dehydrate herbs for your spice cabinet, or air dry a small batch the old-fashioned way. And if you happen to own a freeze dryer like I do, you'll discover just how incredible home-preserved basil can taste months (or even years) later.
No matter which method you choose, you're doing something pretty special.
You're stretching your harvest, reducing food waste, stocking your pantry with wholesome ingredients, and creating meals filled with flavors that came straight from your own backyard.
To me, that's one of the greatest joys of gardening.
❤️ Just Between Us
Every summer, I tell myself I'll plant "just one basil plant."
Every summer, that basil plant politely ignores my plans.
Before I know it, I'm carrying armfuls of basil into the house, filling jars, loading freeze dryer trays, chopping herbs for olive oil cubes, and wondering how one little plant became the overachiever of the garden.
And honestly?
I wouldn't have it any other way.
Because every jar lined up on my pantry shelf reminds me that gardening isn't just about growing food.
It's about preserving memories, sharing meals, and saving a little taste of summer for the days when we need it most.
So the next time your basil starts taking over the garden, don't panic, just grab your garden snips, put on a pot of coffee, and enjoy the harvest.
Next Stop on the Farm
Now that you've learned how to harvest, use, and preserve fresh basil, here are a few more stops around the Farm Girl Fixin's garden that I think you'll enjoy:
🌱 How to Grow Basil for Beginners (Learn how to grow healthy, productive basil plants from seed to harvest.)
🌿 How to Dry Herbs at Home (Discover the best ways to preserve all your favorite culinary herbs.)
🥬 Best Herbs to Grow for Cooking (Build a kitchen garden filled with herbs you'll use all year long.)
🍝 Easy Homemade Basil Pesto Recipe (Coming soon! Put that fresh basil harvest to delicious use.)
🌼 How to Store Dried Herbs for Maximum Freshness (Keep your preserved herbs flavorful for months to come.)
There's always something growing around here, so grab another cup of coffee and stay awhile. I'm so glad you stopped by!


🍓 Let’s Stay Connected
If you love simple, homemade, from-scratch goodness, you’ll fit right in here.
I share freeze drying tips, zero waste kitchen ideas, and all the little farm girl fixin’s along the way 👩🏻🌾
💛 Join me on Facebook
🎥 Watch on YouTube
🌿 Follow along on TikTok
📌 Save ideas on Pinterest
🛒 Shop my Amazon favorites
✉️ Grab my free kitchen tips + join my list
Just a little heads up, friend...some of the links on this page may be affiliate links. That means if you grab something through them, I may earn a small commission (at no extra cost to you). It’s basically like you buying me a coffee while I share all my favorite cozy kitchen finds with you. I only ever recommend what I truly love and use myself.